Setup
Overview
There are three steps to run Github actions workflows in your own cloud infrastructure using WarpBuild:
- Connect your cloud account: Sets up the IAM role with the required permissions.
- Setup a WarpBuild Stack: Configure a region, VPC, and network settings as context for the runners.
- Create a custom runner: Configure the instance types, disk, and IP configuration for the runners.
Cloud provider specific setup guides for each of the steps are:
- AWS
- Azure (coming soon)
- GCP (coming soon)
Install the WarpBuild Github bot and provide access to the repositories you want to run workflows on, before proceeding with these steps.
1. Connect your cloud account
A connection to your cloud account creates an IAM role with the permissions required to setup and manage Github actions runners in your cloud account. This IAM role is used to import configurations and create a WarpBuild Stack in a region and VPC.
Go to BYOC in WarpBuild dashboard and click on the Connect Cloud Account button.
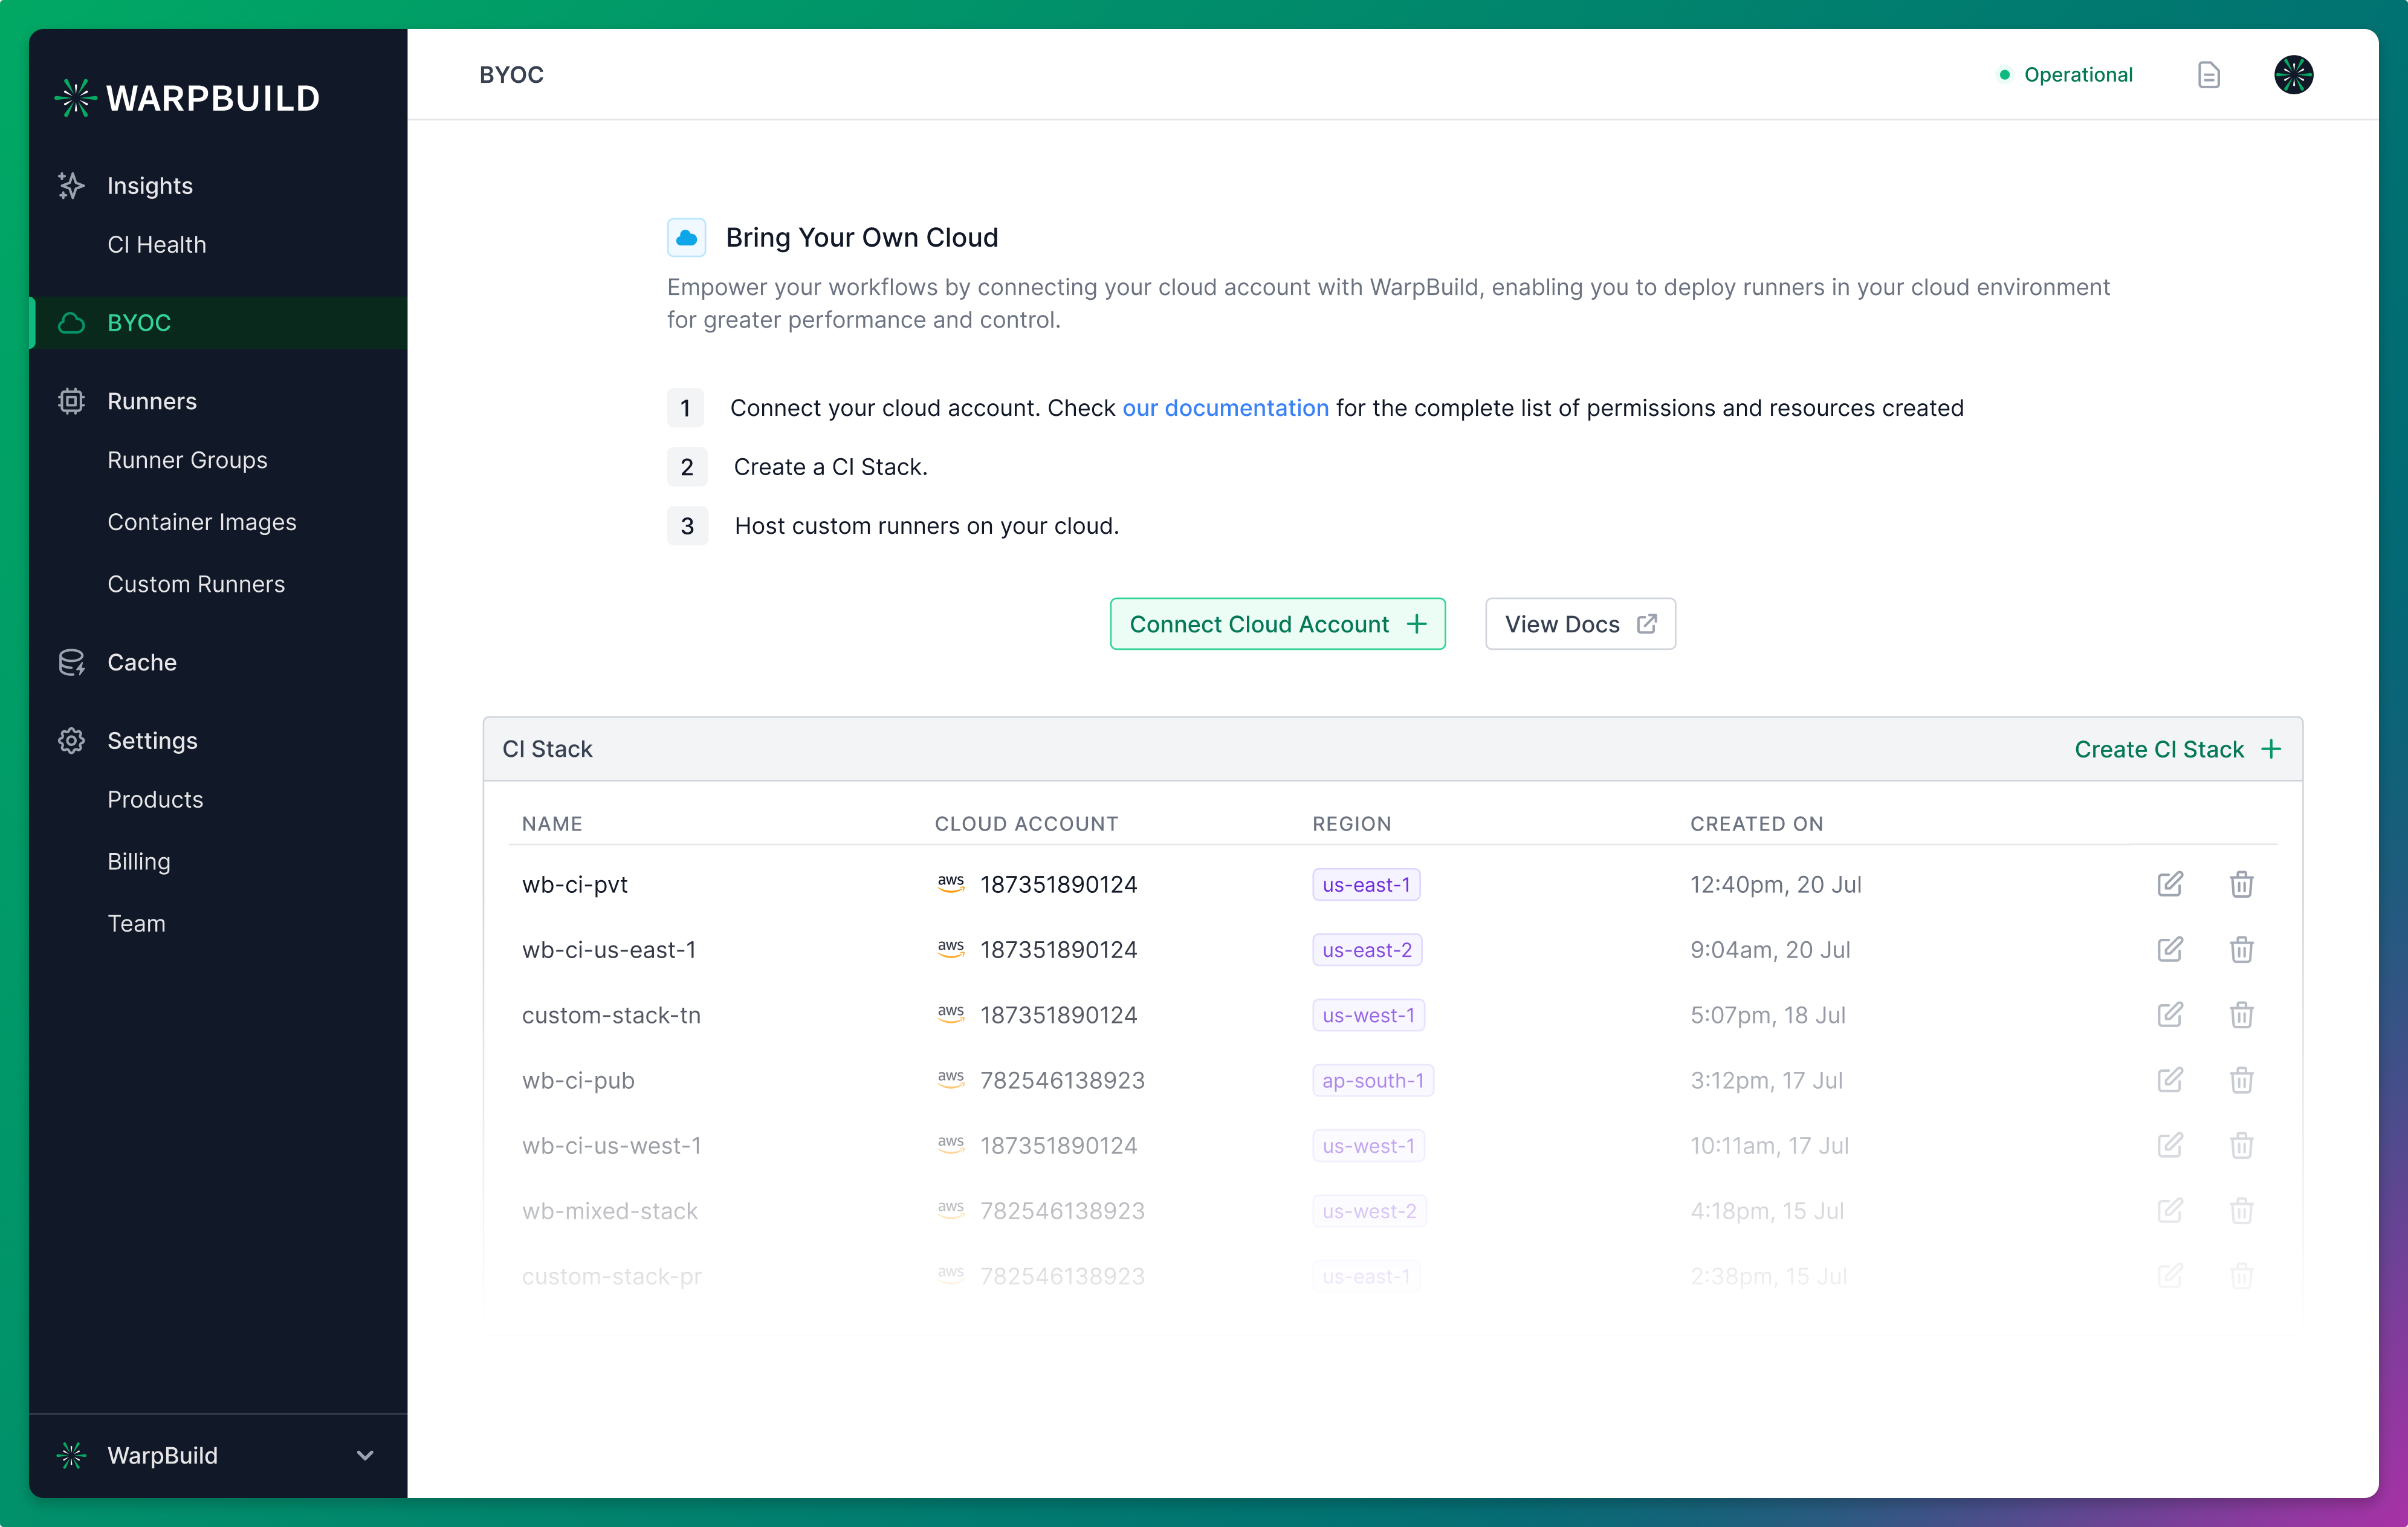
2. Setup a WarpBuild Stack
A WarpBuild Stack is a group of infrastructure components in a specific region of your cloud account, required by WarpBuild to run your CI workflows. These components include VPC, subnets, and object storage buckets.
💡 Tip: Naming the stack with the product and region info may be helpful for keeping track of resources. Examples:
twitch-use1andalexa-use2.
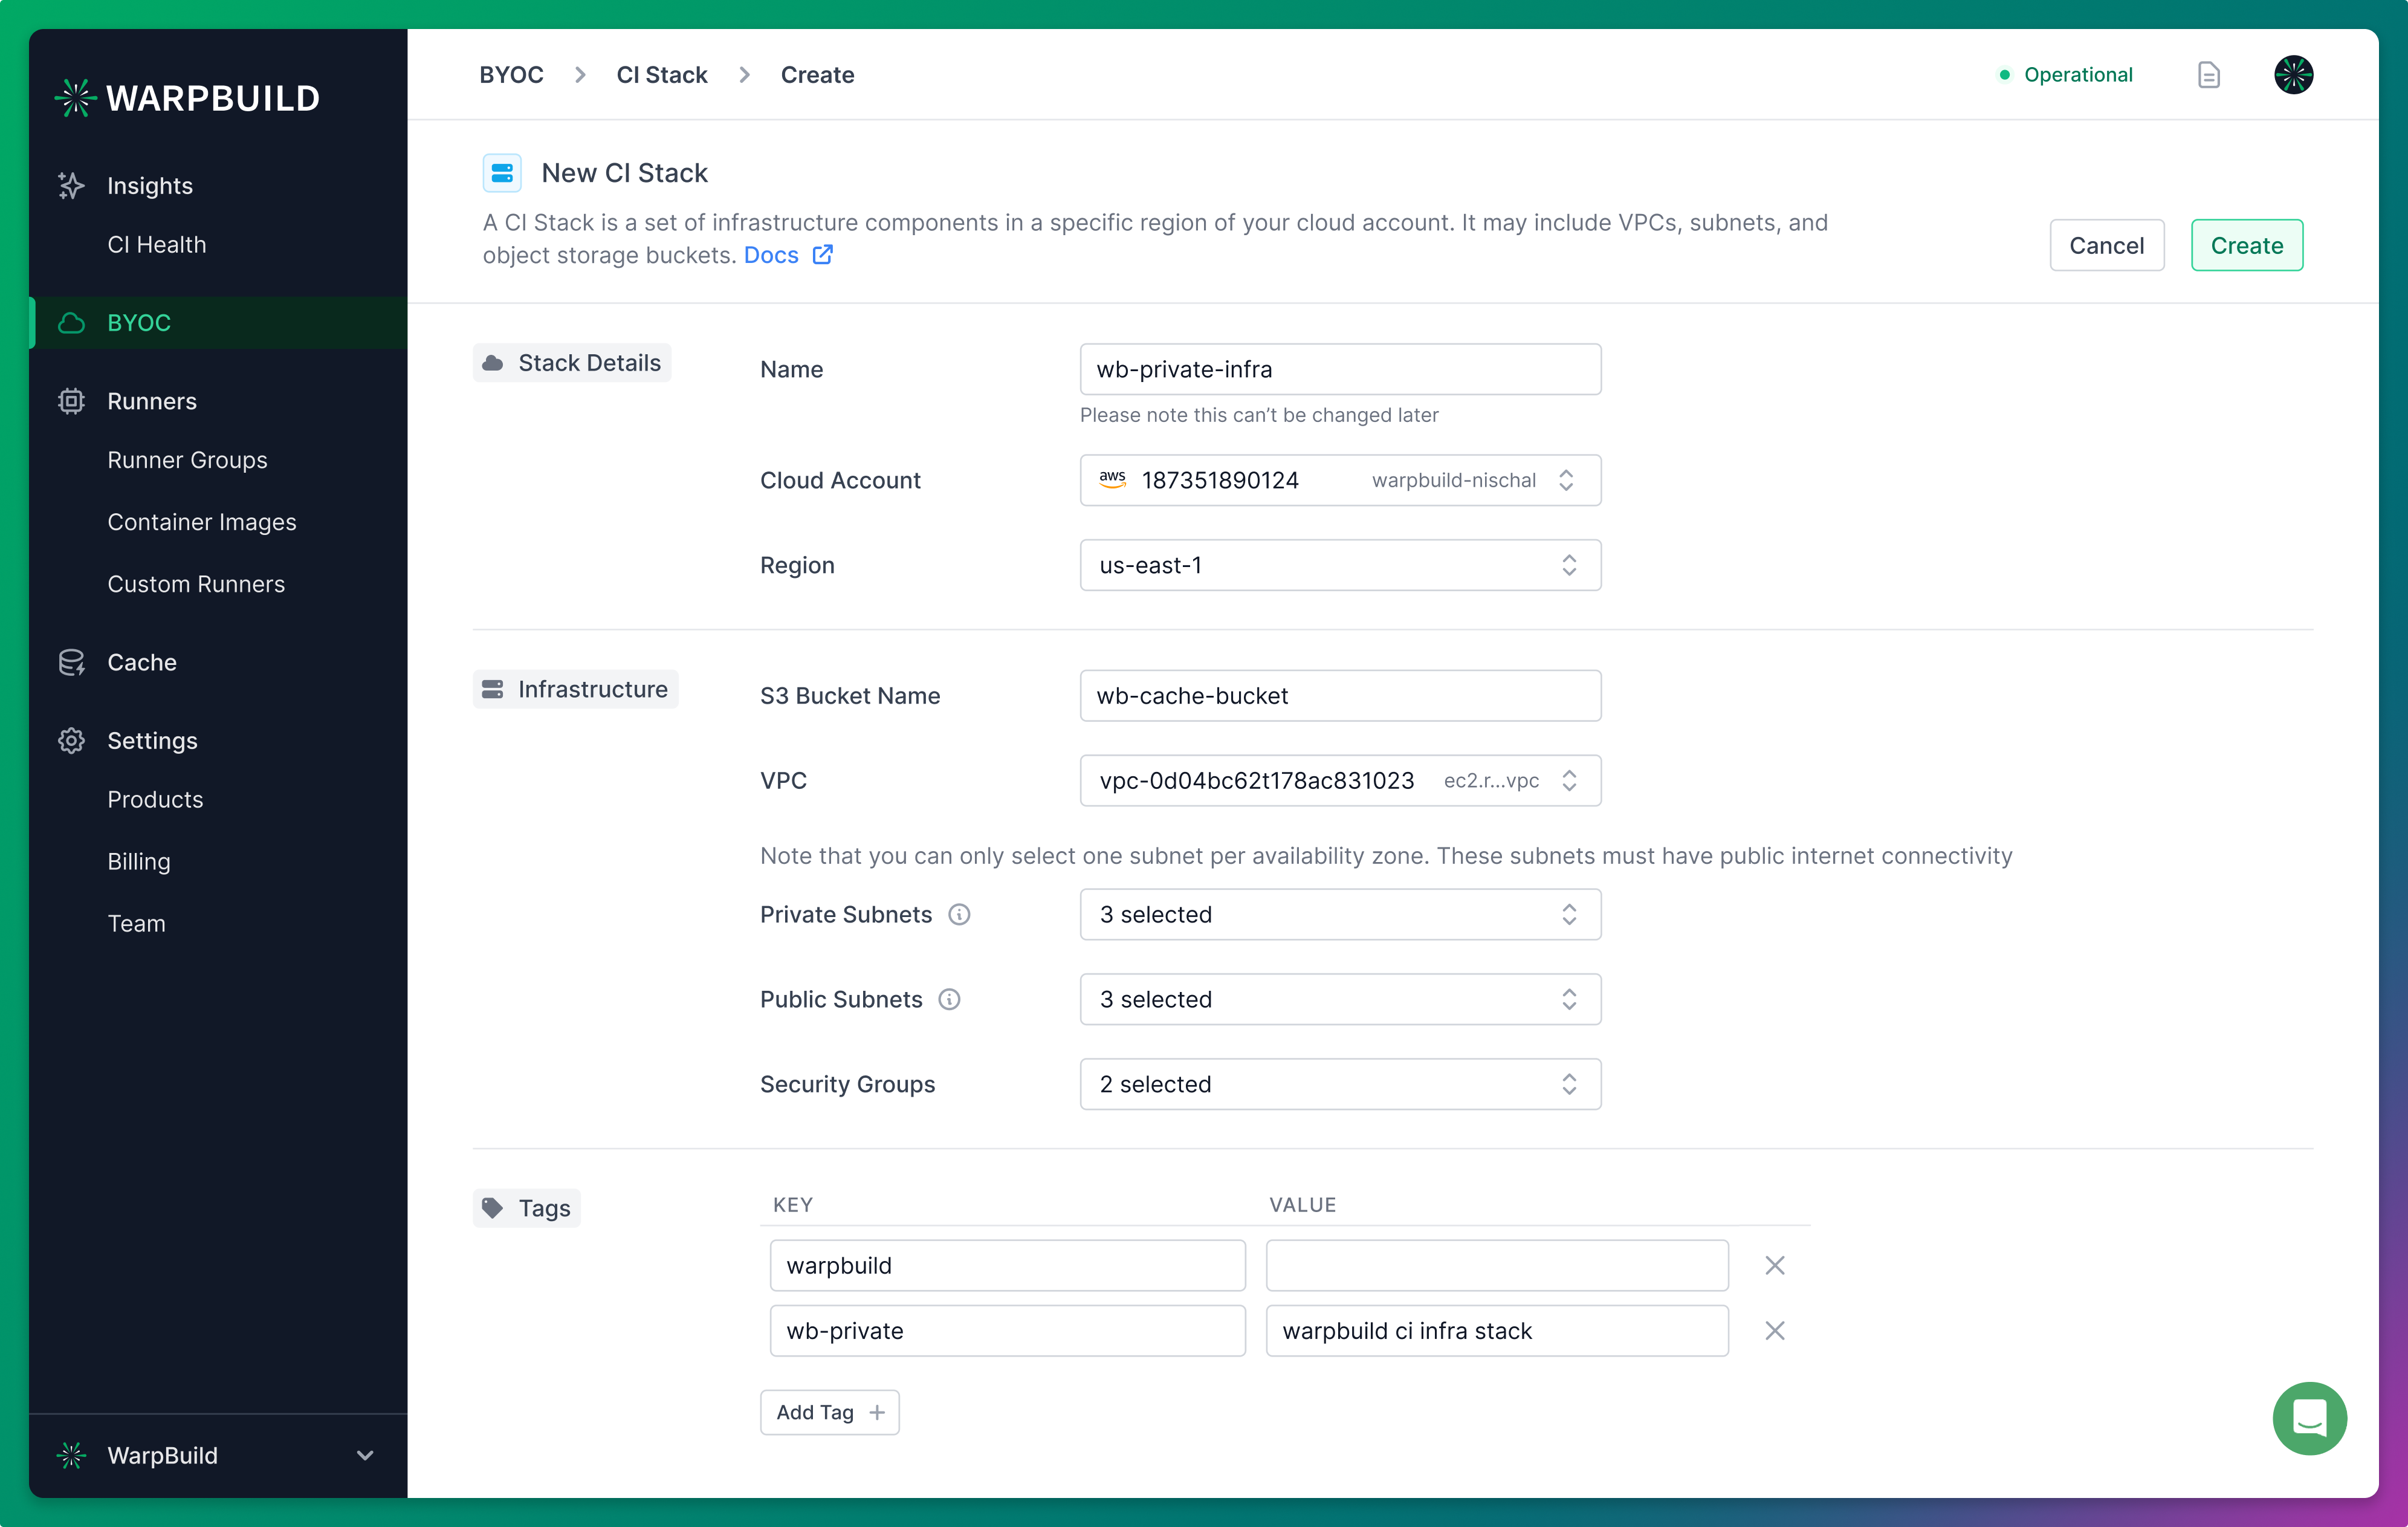
The object storage bucket in the selected region is used as cache storage, container images layer cache, logs, and storing other workflow artifacts.
The stack name, object storage location, and region cannot be changed after creation.
Import Flow: Create runners in an existing VPC
In the import flow, all the resources must already exist and be supplied as inputs.
Select your cloud account, region, VPC, and network configuration in which you want to create a Stack. The name of the stack is used for reference throughout the dashboard and cannot be changed after stack creation.
Refer to the cloud provider specific setup guide for more details on the inputs and best practices here.
Easy Create Flow: Create all resources in a new VPC
The easy create flow creates the required resources and configures them according to best practices.
Refer to the cloud provider specific guide for more details on resources created here.
3. Create a custom runner
You can now create custom runners that are used in the Github actions workflows.
Click on the Add Custom Runner button and choose the Stack you just created from the stacks dropdown.

The name of the runner is immutable and is used to reference the runner in Github actions workflows.
name: CI
on: [push]
jobs:
build:
  runs-on: warp-custom-ci-stack-runner
  steps:
    - uses: actions/checkout@v3
    - run: npm run build
Multiple instance types
You can provide multiple instance types within the same runner configuration. This is useful when the capacity for a specific instance type is unavailable in a region, in which case the runner can fallback to a different instance type. For this reason, it is recommended to choose instances with roughly similar performance to ensure consistency (for example, m7a.xlarge and m7i.xlarge on aws).
This is especially useful for spot instances. The instance type is chosen based on availability and price.
Static IPs
Enabling static IPs creates the runners in private subnets behind a NAT gateway. This can incur data transfer costs in multiple ways:
- Outbound data transfer from the runner instance to the internet at data egress rates ~$0.45/GB.
- NAT gateway data processing fees at ~$0.45/GB for inbound and outbound data transfer.
- Inter region data transfer costs between the private subnets and the NAT gateway.
This can become very expensive and runners with static IPs should be used minimally.
When static IPs are disabled, the runner instances are created in public subnets and are not behind a NAT gateway. This ensures that no data transfer costs are incurred for ingress and there is usually minimal egress for CI workloads. Refer to the best practices guide for more information on network setup.
Updates and deletes
WarpBuild may require changes to cloud connections or Stacks to support new features. These will show up as updates and need to be applied.
Deleting a Cloud Connection: A confirmation will be shown along with the list of Stacks that depend on this cloud connection. The cloud connection cannot be deleted until the stacks depending on it are deleted.
Deleting a Stack: A confirmation will be shown along with the list of custom runner configurations that depend on this stack. The stack cannot be deleted until the custom runner configurations depending on it are deleted.